Beginners Guide to Growing Garlic
It’s that time of year for most of us! Planting garlic is so rewarding and in this beginners guide to growing garlic, I will give you step by step directions.
Let’s talk types of garlic!
Garlic is such a versatile food. Not only is it extremely delicious in many dishes, garlic has wonderful medicinal properties. I noticed a few years ago that the garlic I was buying in the local grocery store was grown in CHINA! What??
Garlic comes in two types – hard neck and soft neck. So what’s the difference?
Hard neck types send up a stalk in the spring called a scape (cut those and sauté them up!) while soft neck types do not. Soft neck types tend to have a longer shelf life because the skins are much tighter around the bulbs. You can braid those beauties after they have cured.
This post contains affiliate links, which means I make a small commission at no extra cost to you.
So many amazing varieties to choose from
Choosing a variety can be overwhelming but it’s also a great opportunity to try something new. Go to your favorite seed company’s website and read about which ones they offer. I look for varieties that grow well in my growing zone and just pick some that look interesting! Try not to overthink it.
This year I am growing three varieties:
- Chesnok red purple stripe (hard neck)
- Persian Star (hard neck)
- Inchelium red (soft neck)
I bought mine from MI Gardener and I had great results from Seeds Now.
Ok garlic is ordered! Now what?
While you are waiting start to prep your soil. If you just pulled out summer crops add some compost to put nutrients back into the soil. This year I am actually adding soil to my raised bed because it was a little low. Plus my naughty puppy decided to dig in that bed several times!
I just bought a high quality potting mix/compost soil from my local small locally owned nursery. It’s called Daddy Pete’s Raised Bed Soil but you can get some awesome ones like this from Amazon or others from your local big box stores. Look for organic soils with added compost.

October/early November is the ideal time to plant in my growing zone (7B). If you aren’t sure what your growing zone is google “growing zone” and your zip code.
Let’s get planting!
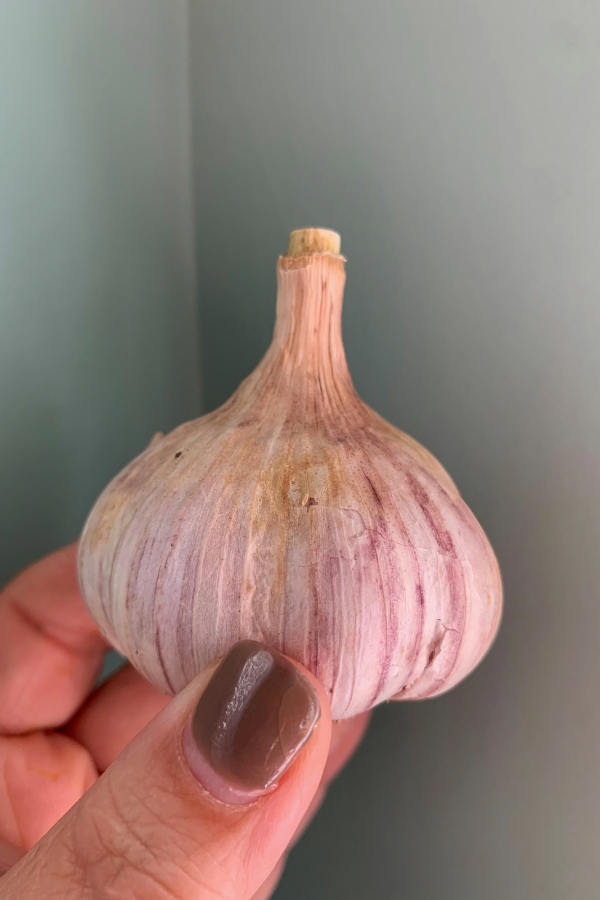
Separate your seed garlic head into bulbs. Each bulb will grow into a whole head! You will plant each bulb pointy side up in loose soil about 4-6 inches apart.
- Start by scraping out trenches 4-6 inches apart in your beds.
- Add some worm castings into the trench. This is a great brand!
- Push each clove of garlic pointy side up into the soil 4-6 inches apart.
- Fill the trench in with soil.
- Water them well (not too much!)
- Add a light layer of straw mulch or leaf mulch or grass clippings.
- As the garlic grows you can add more mulch if desired.
Garlic will start to grow in the fall, overwinter and then start growing again until they are ready to harvest in June/July. Isn’t that amazing??
Allow them to cure for about 3 weeks after harvesting. I put mine on a wire shelf. After they are dried wipe off all the remaining soil, cut the roots off the bottom and braid the soft neck and trim the necks off the hard neck varieties.

If you planted hard neck varieties you will be able to harvest the scapes in the spring.
As you can see in this beginners guide to growing garlic, growing garlic is for everyone! And food Independence is for everyone too! I talk about that here
Food Independence can be simply growing garlic or making fermented foods or learning how to create a pollinator garden. Baby steps! Learning it all at once or doing it all isn’t realistic but you can learn and do one thing at a time.
Happy Garlic Growing!